The GameCube is an extremely compact console, but it is not too difficult to take apart once you know what to do.
Tools
- 4.5 mm game bit
- Phillips screwdriver
Procedure
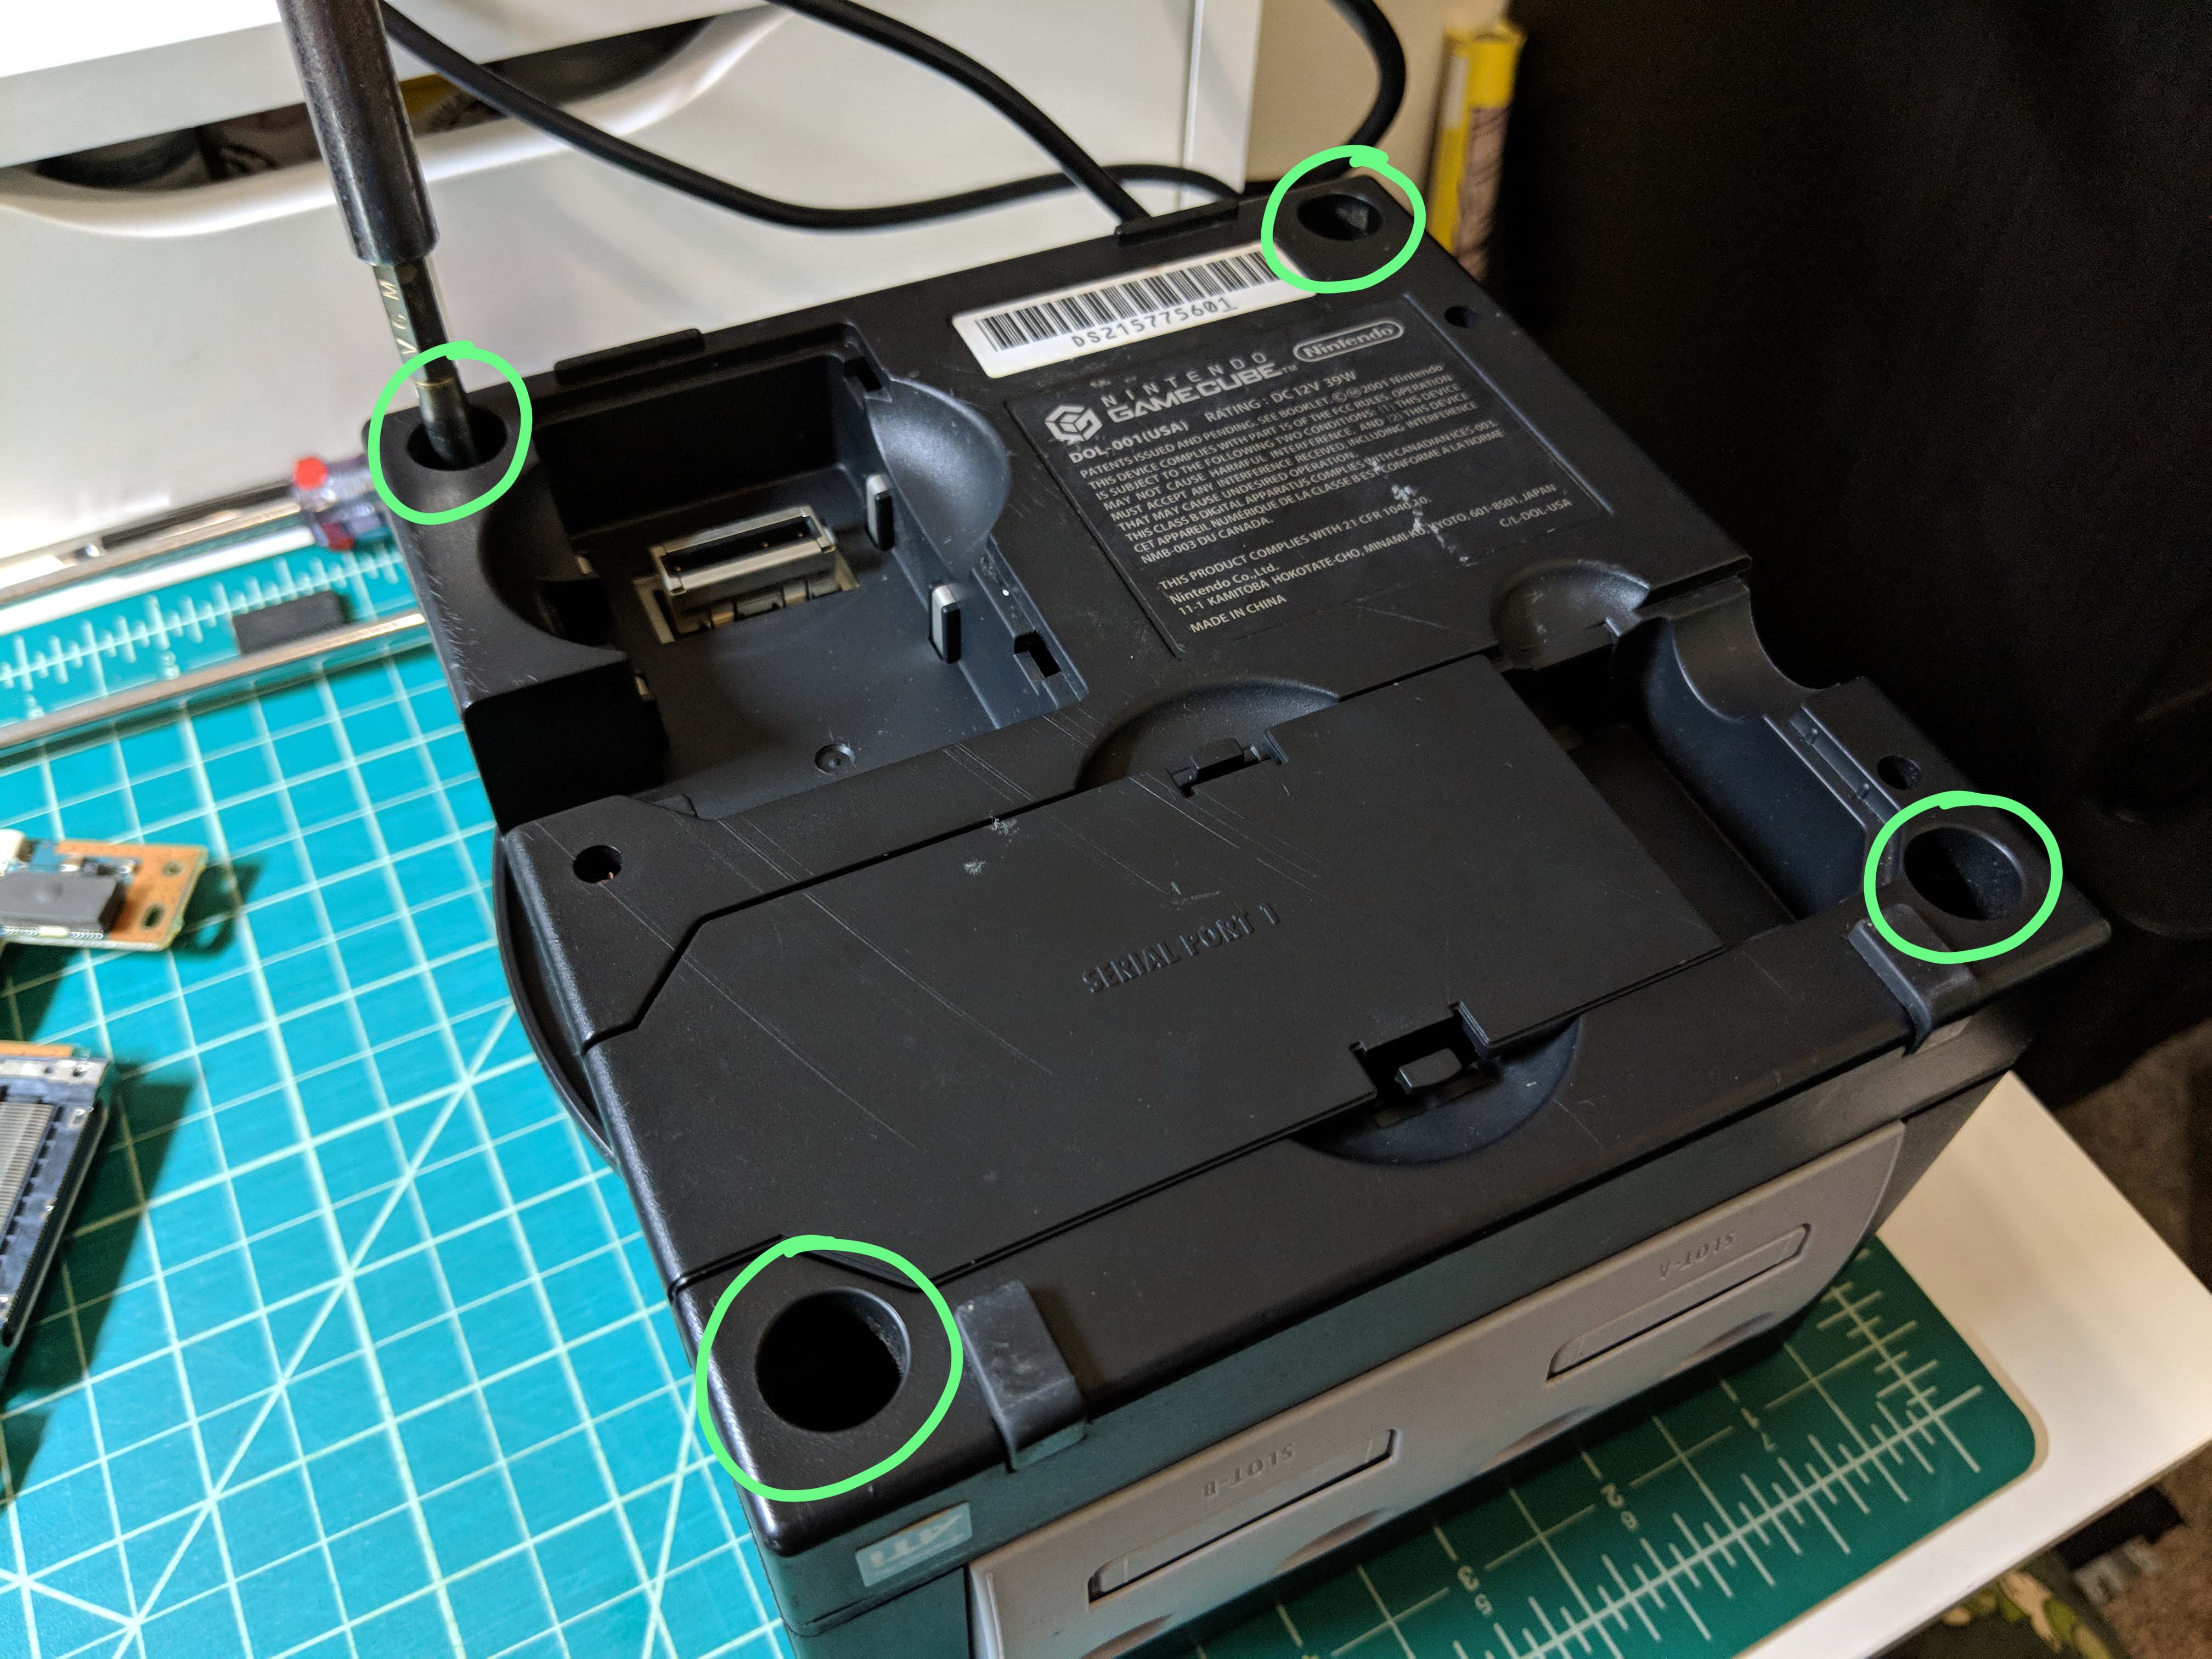
Flip the GameCube over and remove the four screws on the bottom using the game bit.
Flip the GameCube right side up and pull the top off. It should come off easily. Set the top aside.
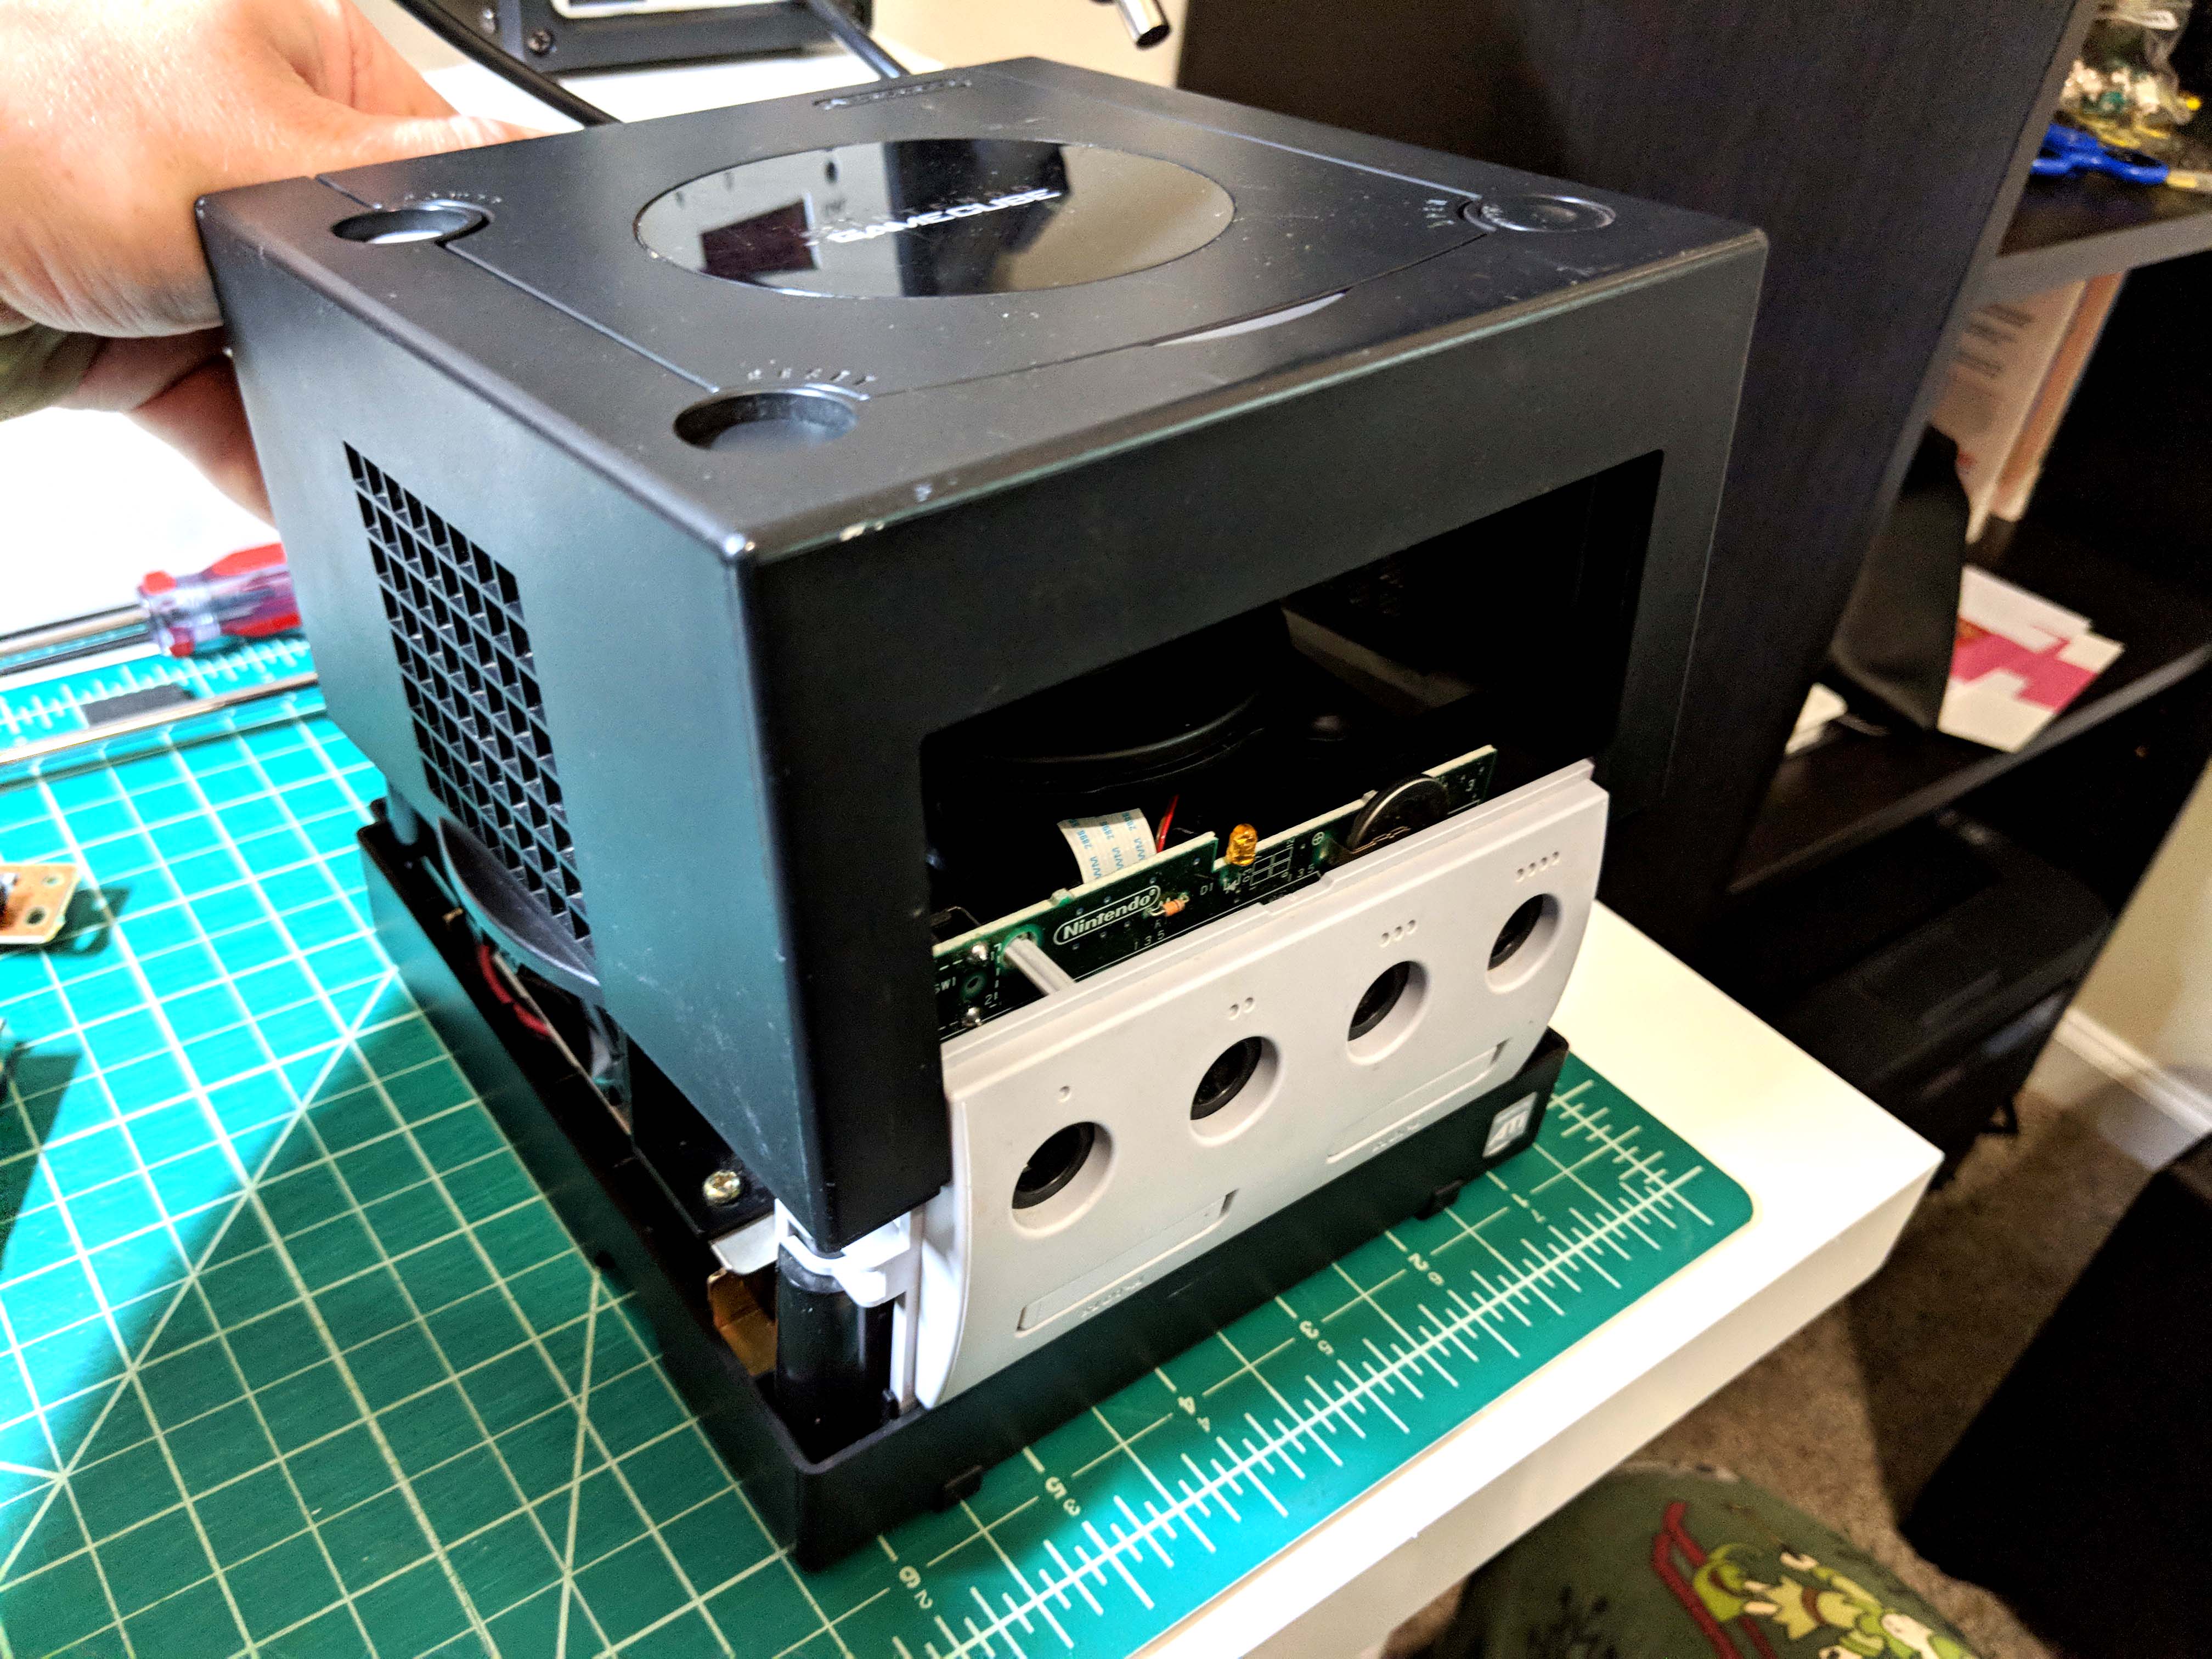
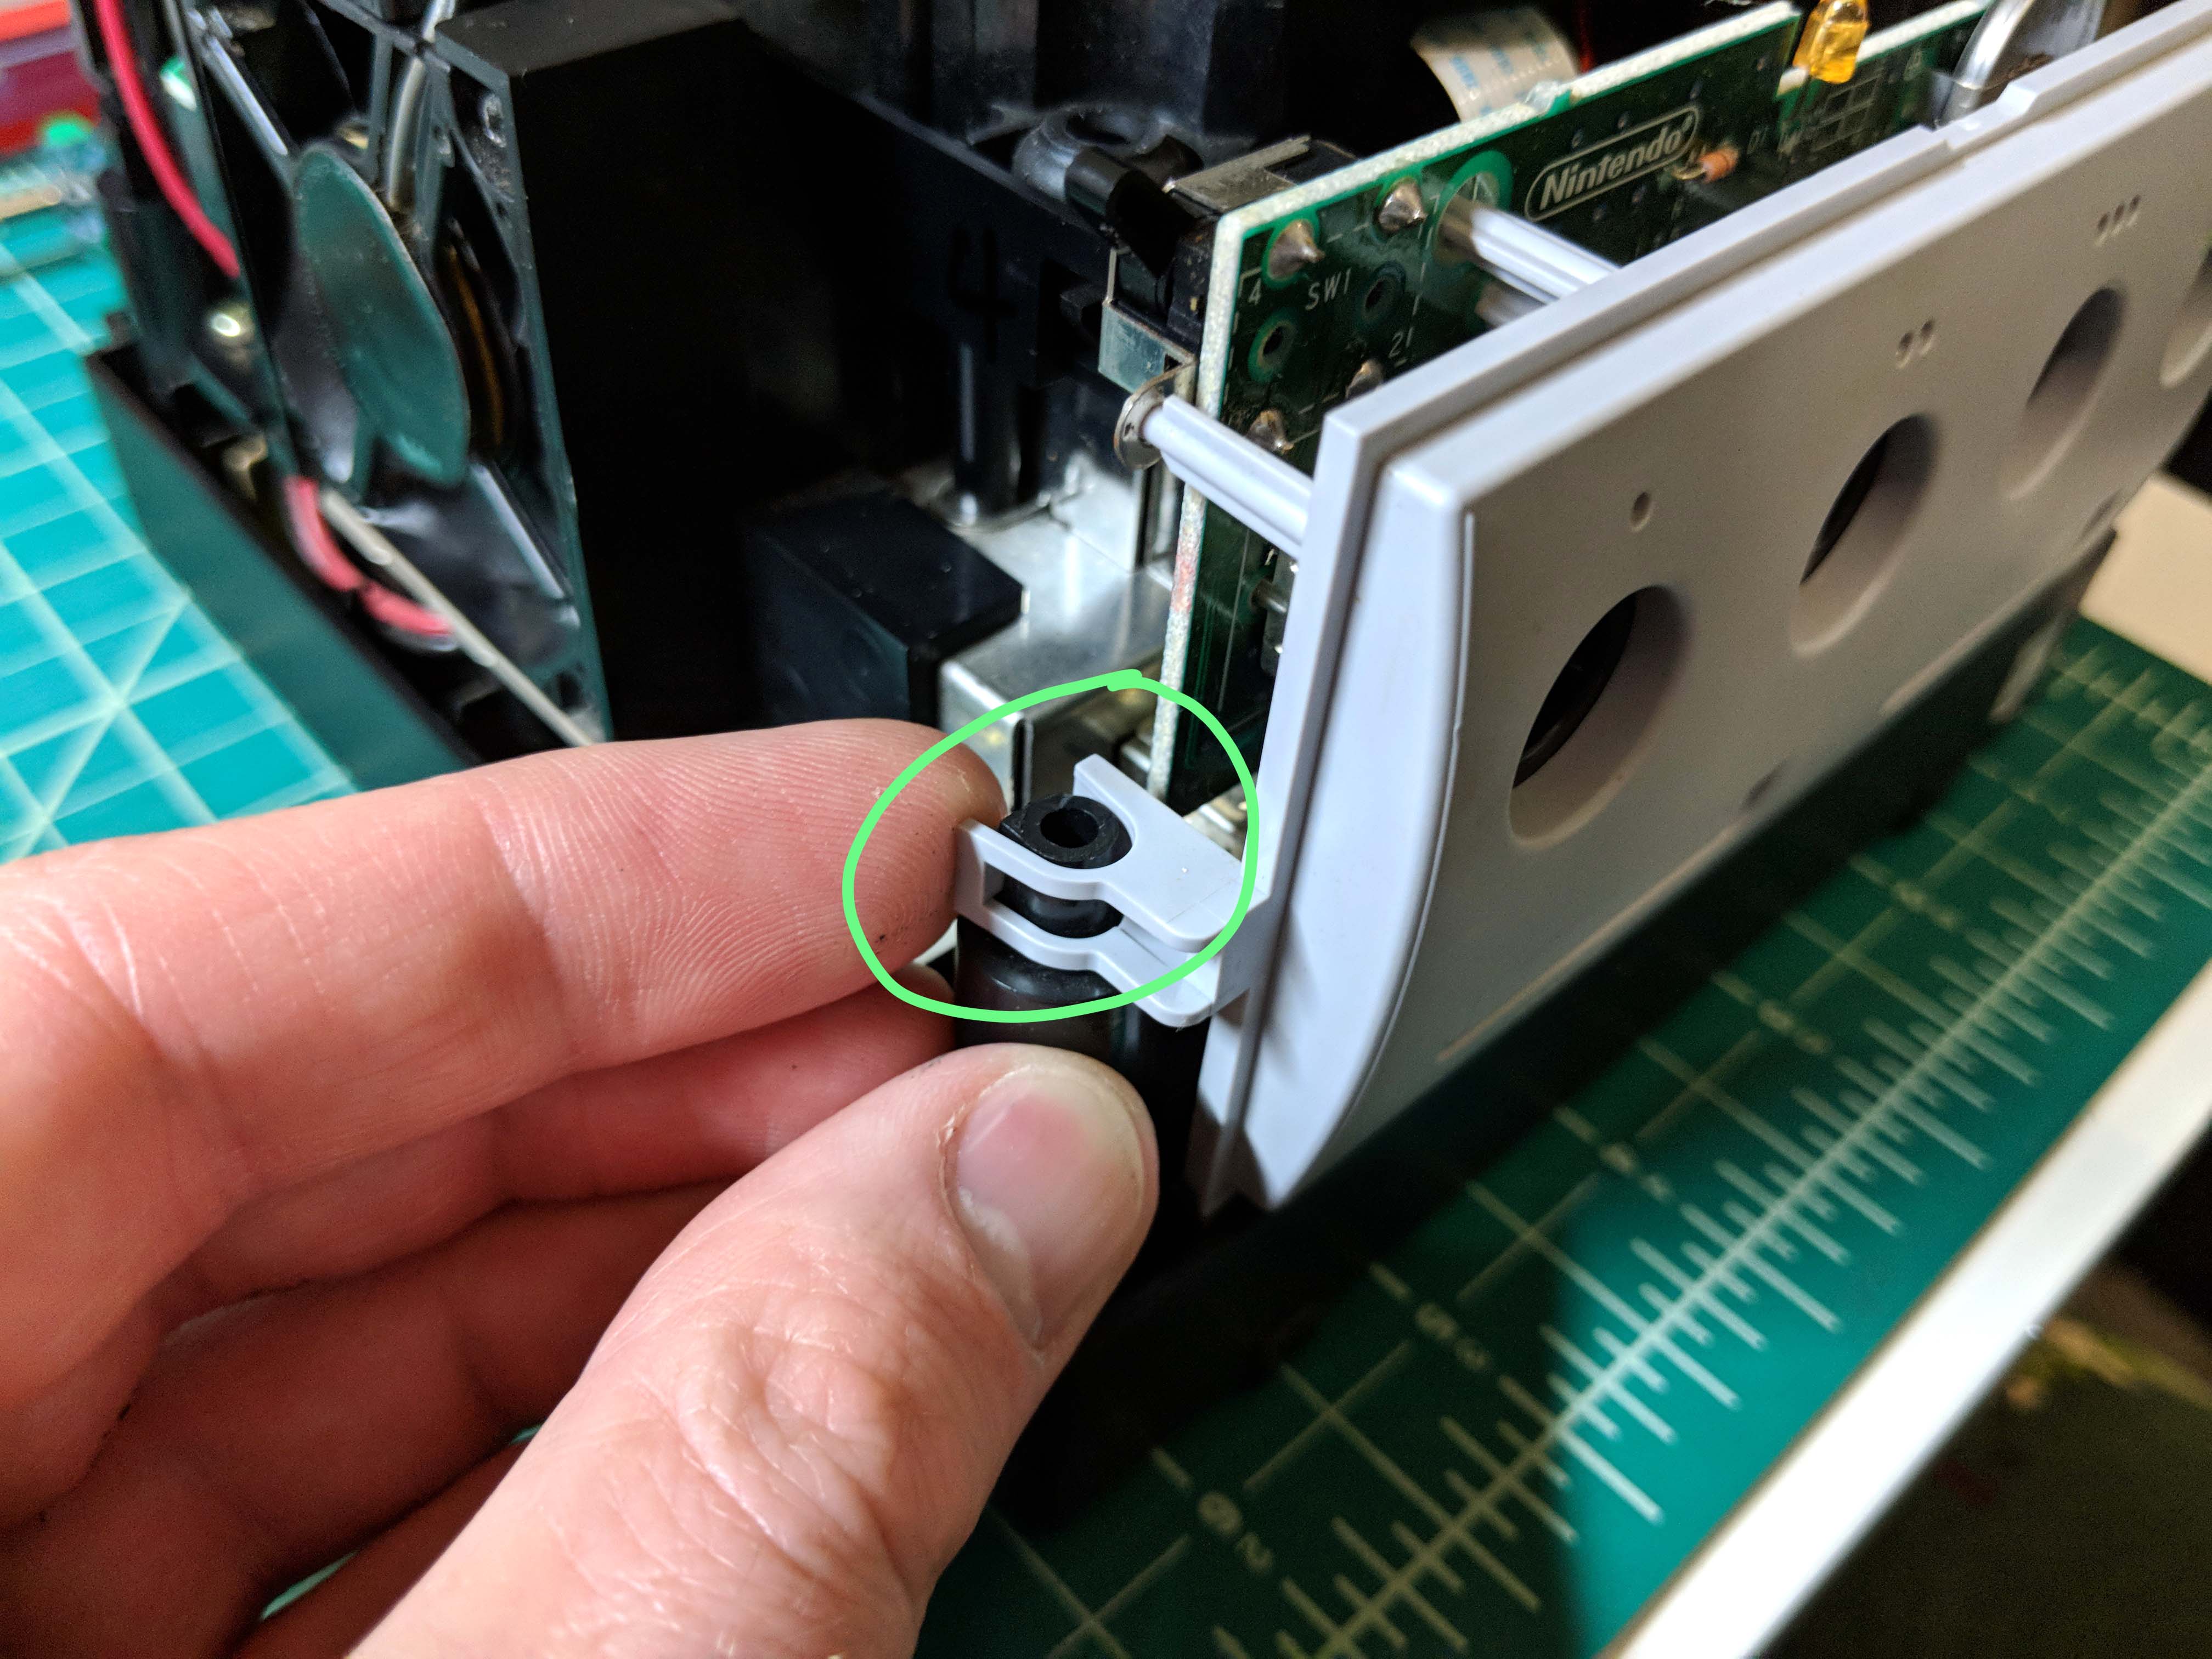
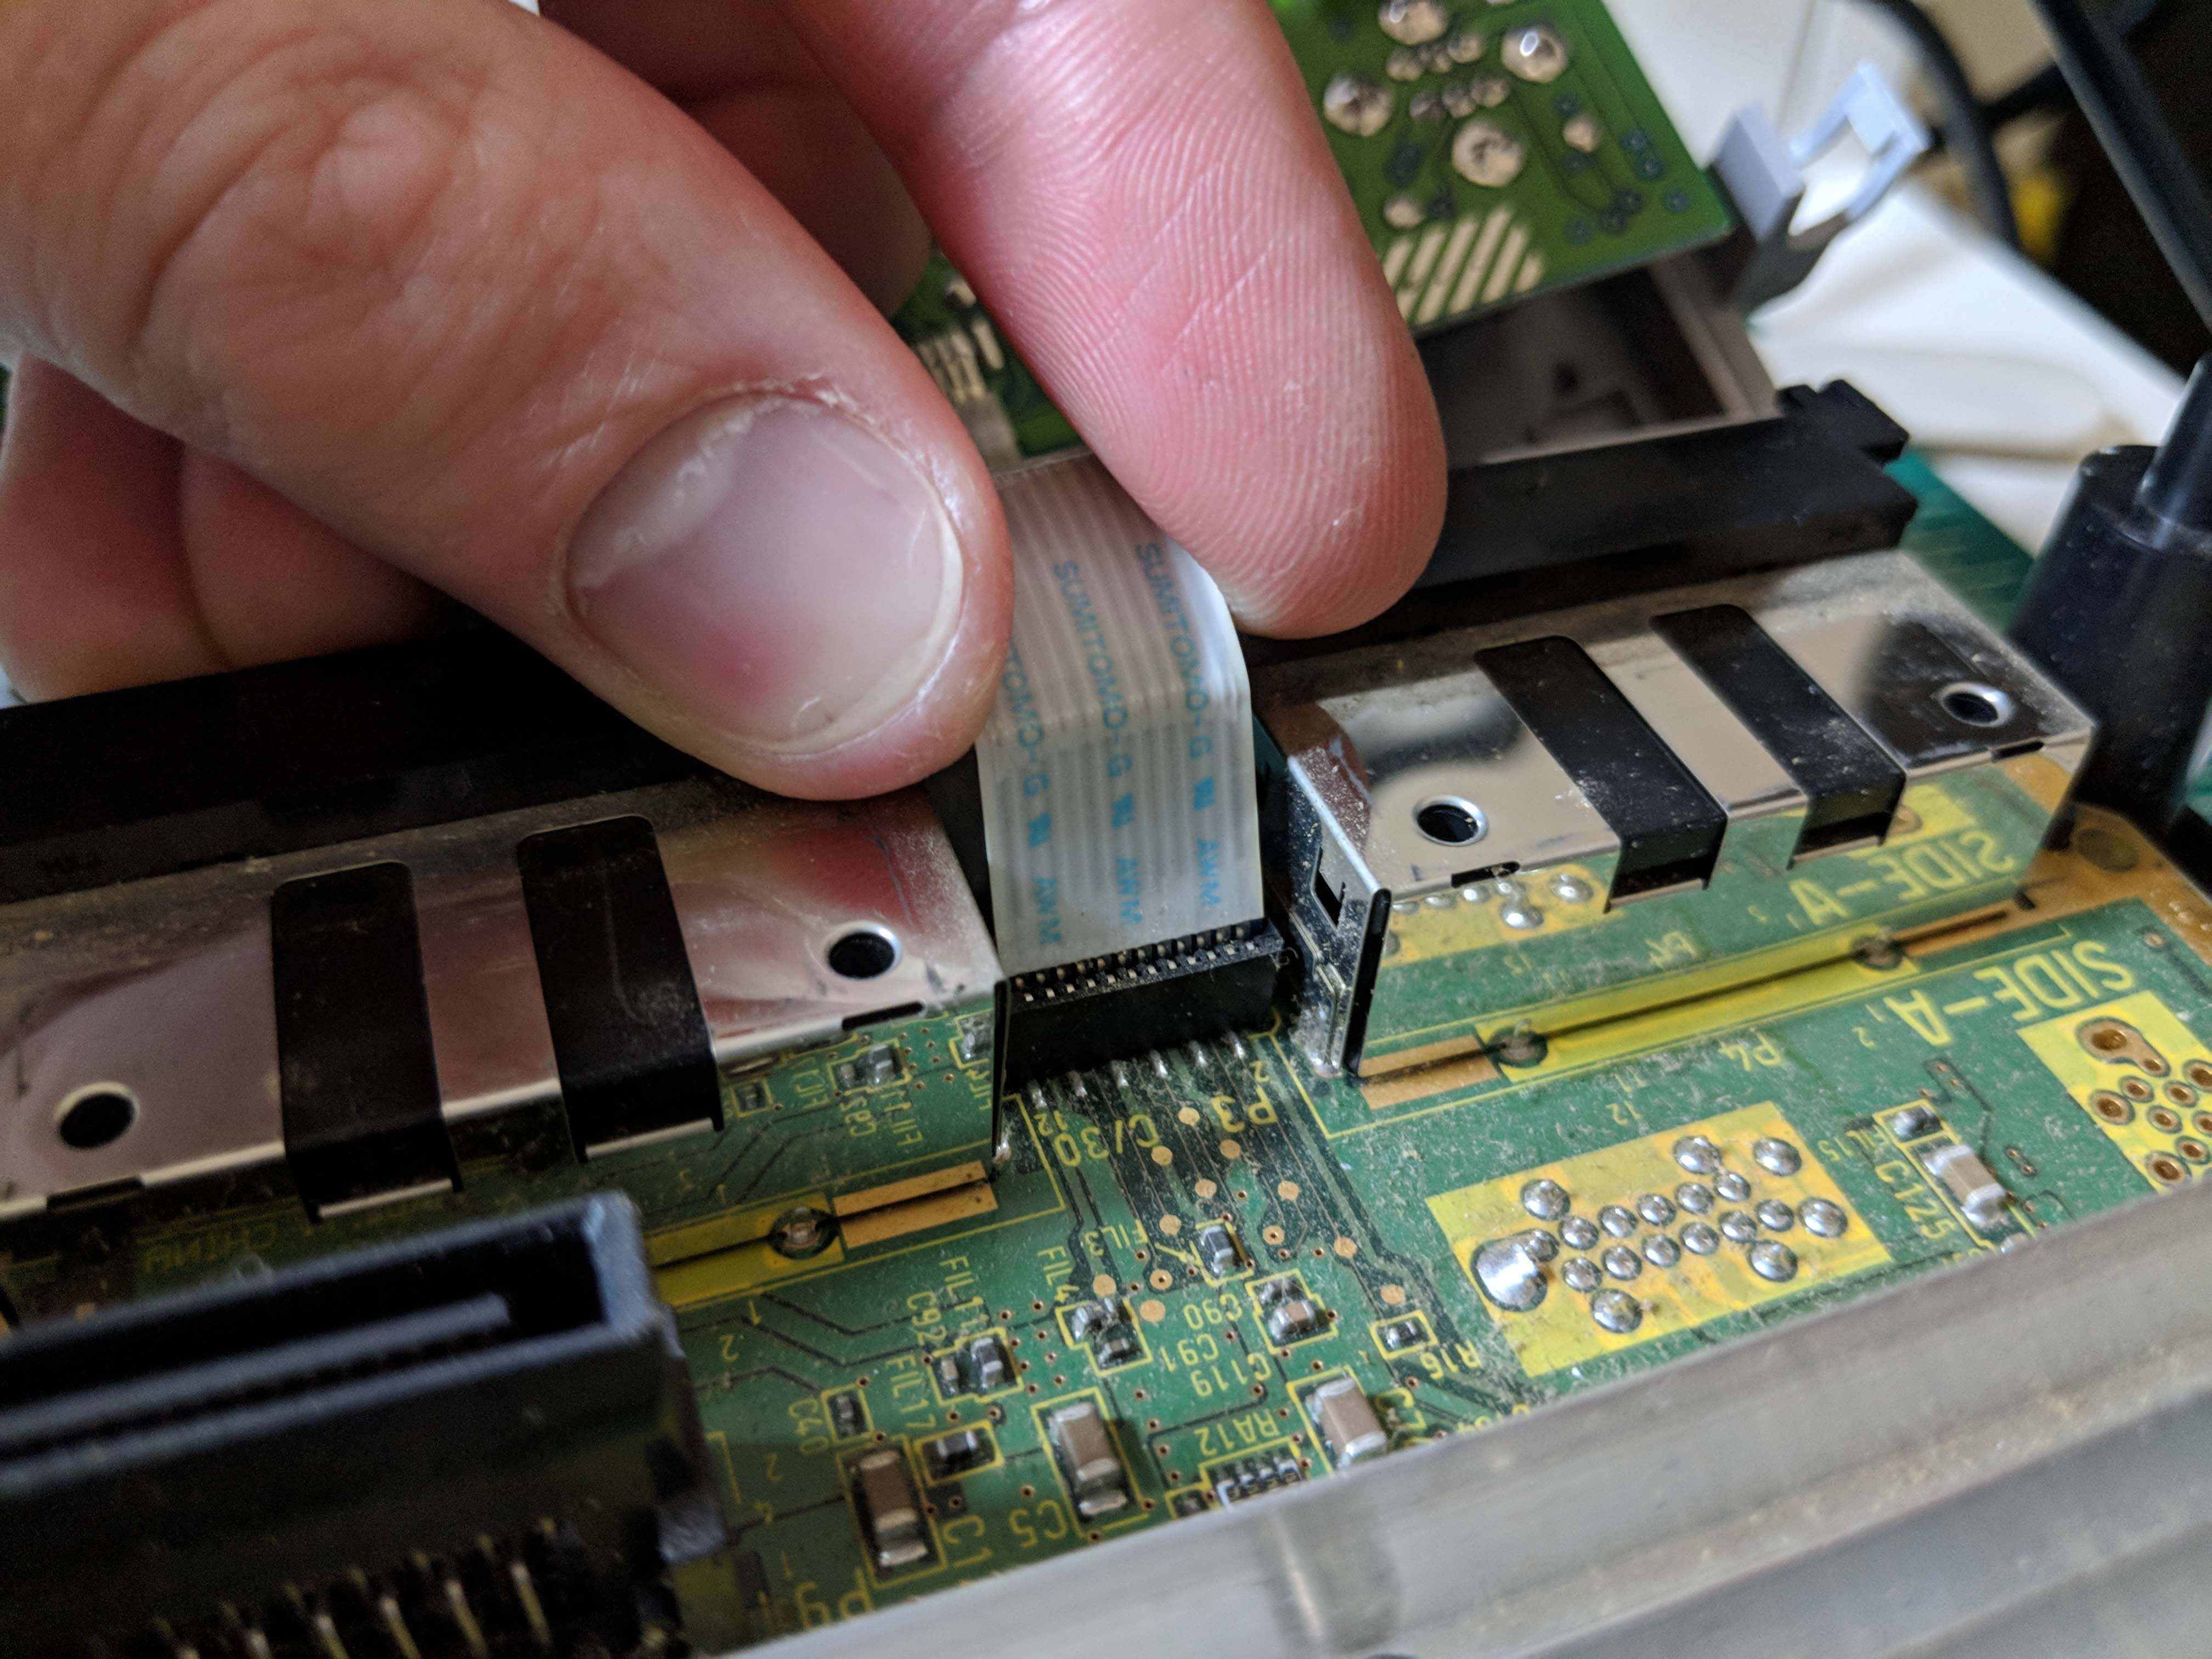
Pull forward on the tabs on either side of the controller port panel, then carefully pull the FFC cable out from the motherboard to free the cover. Set it aside. Note: the drive assembly was already removed in the second picture. Don’t worry about that yet.
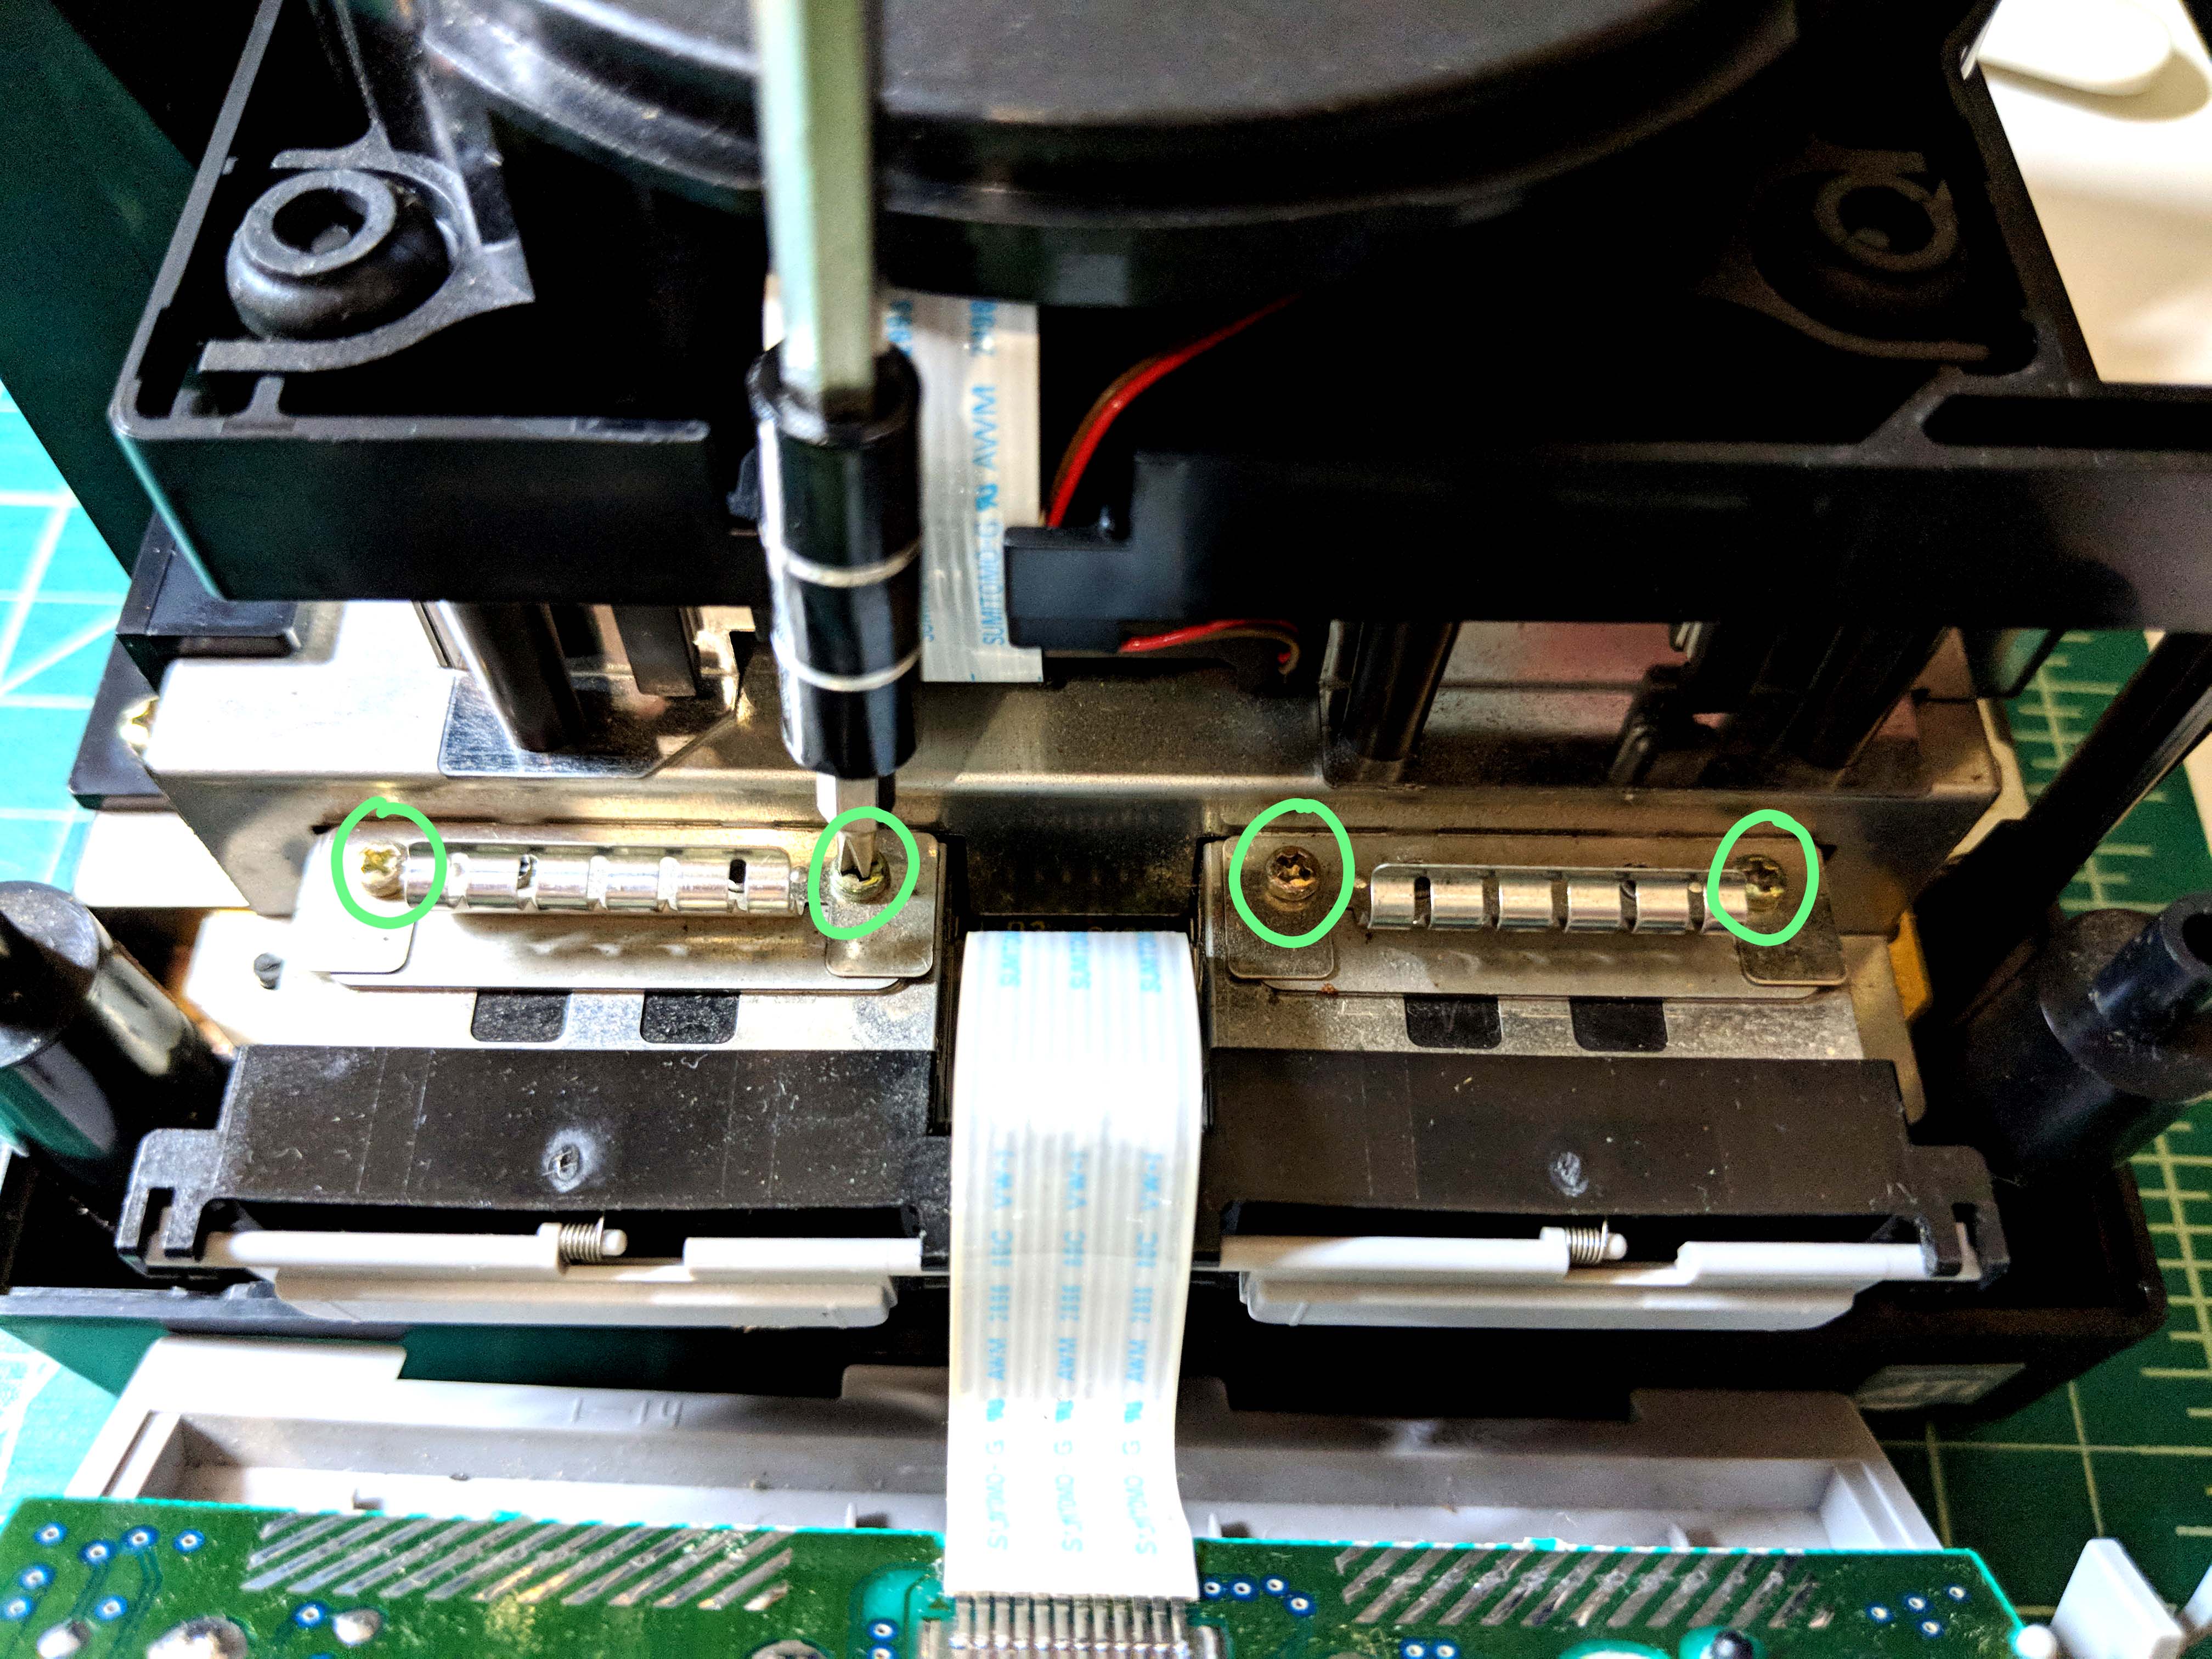
Remove the four screws from the grounding tabs behind where the controller assembly was, then remove the grounding tabs. Ignore the FFC cable in this picture, this is what you should have pulled out in the previous step.
Remove the two screws on either side of the fan assembly, then unplug the black and red power cable. Remove the fan assembly and set it aside.

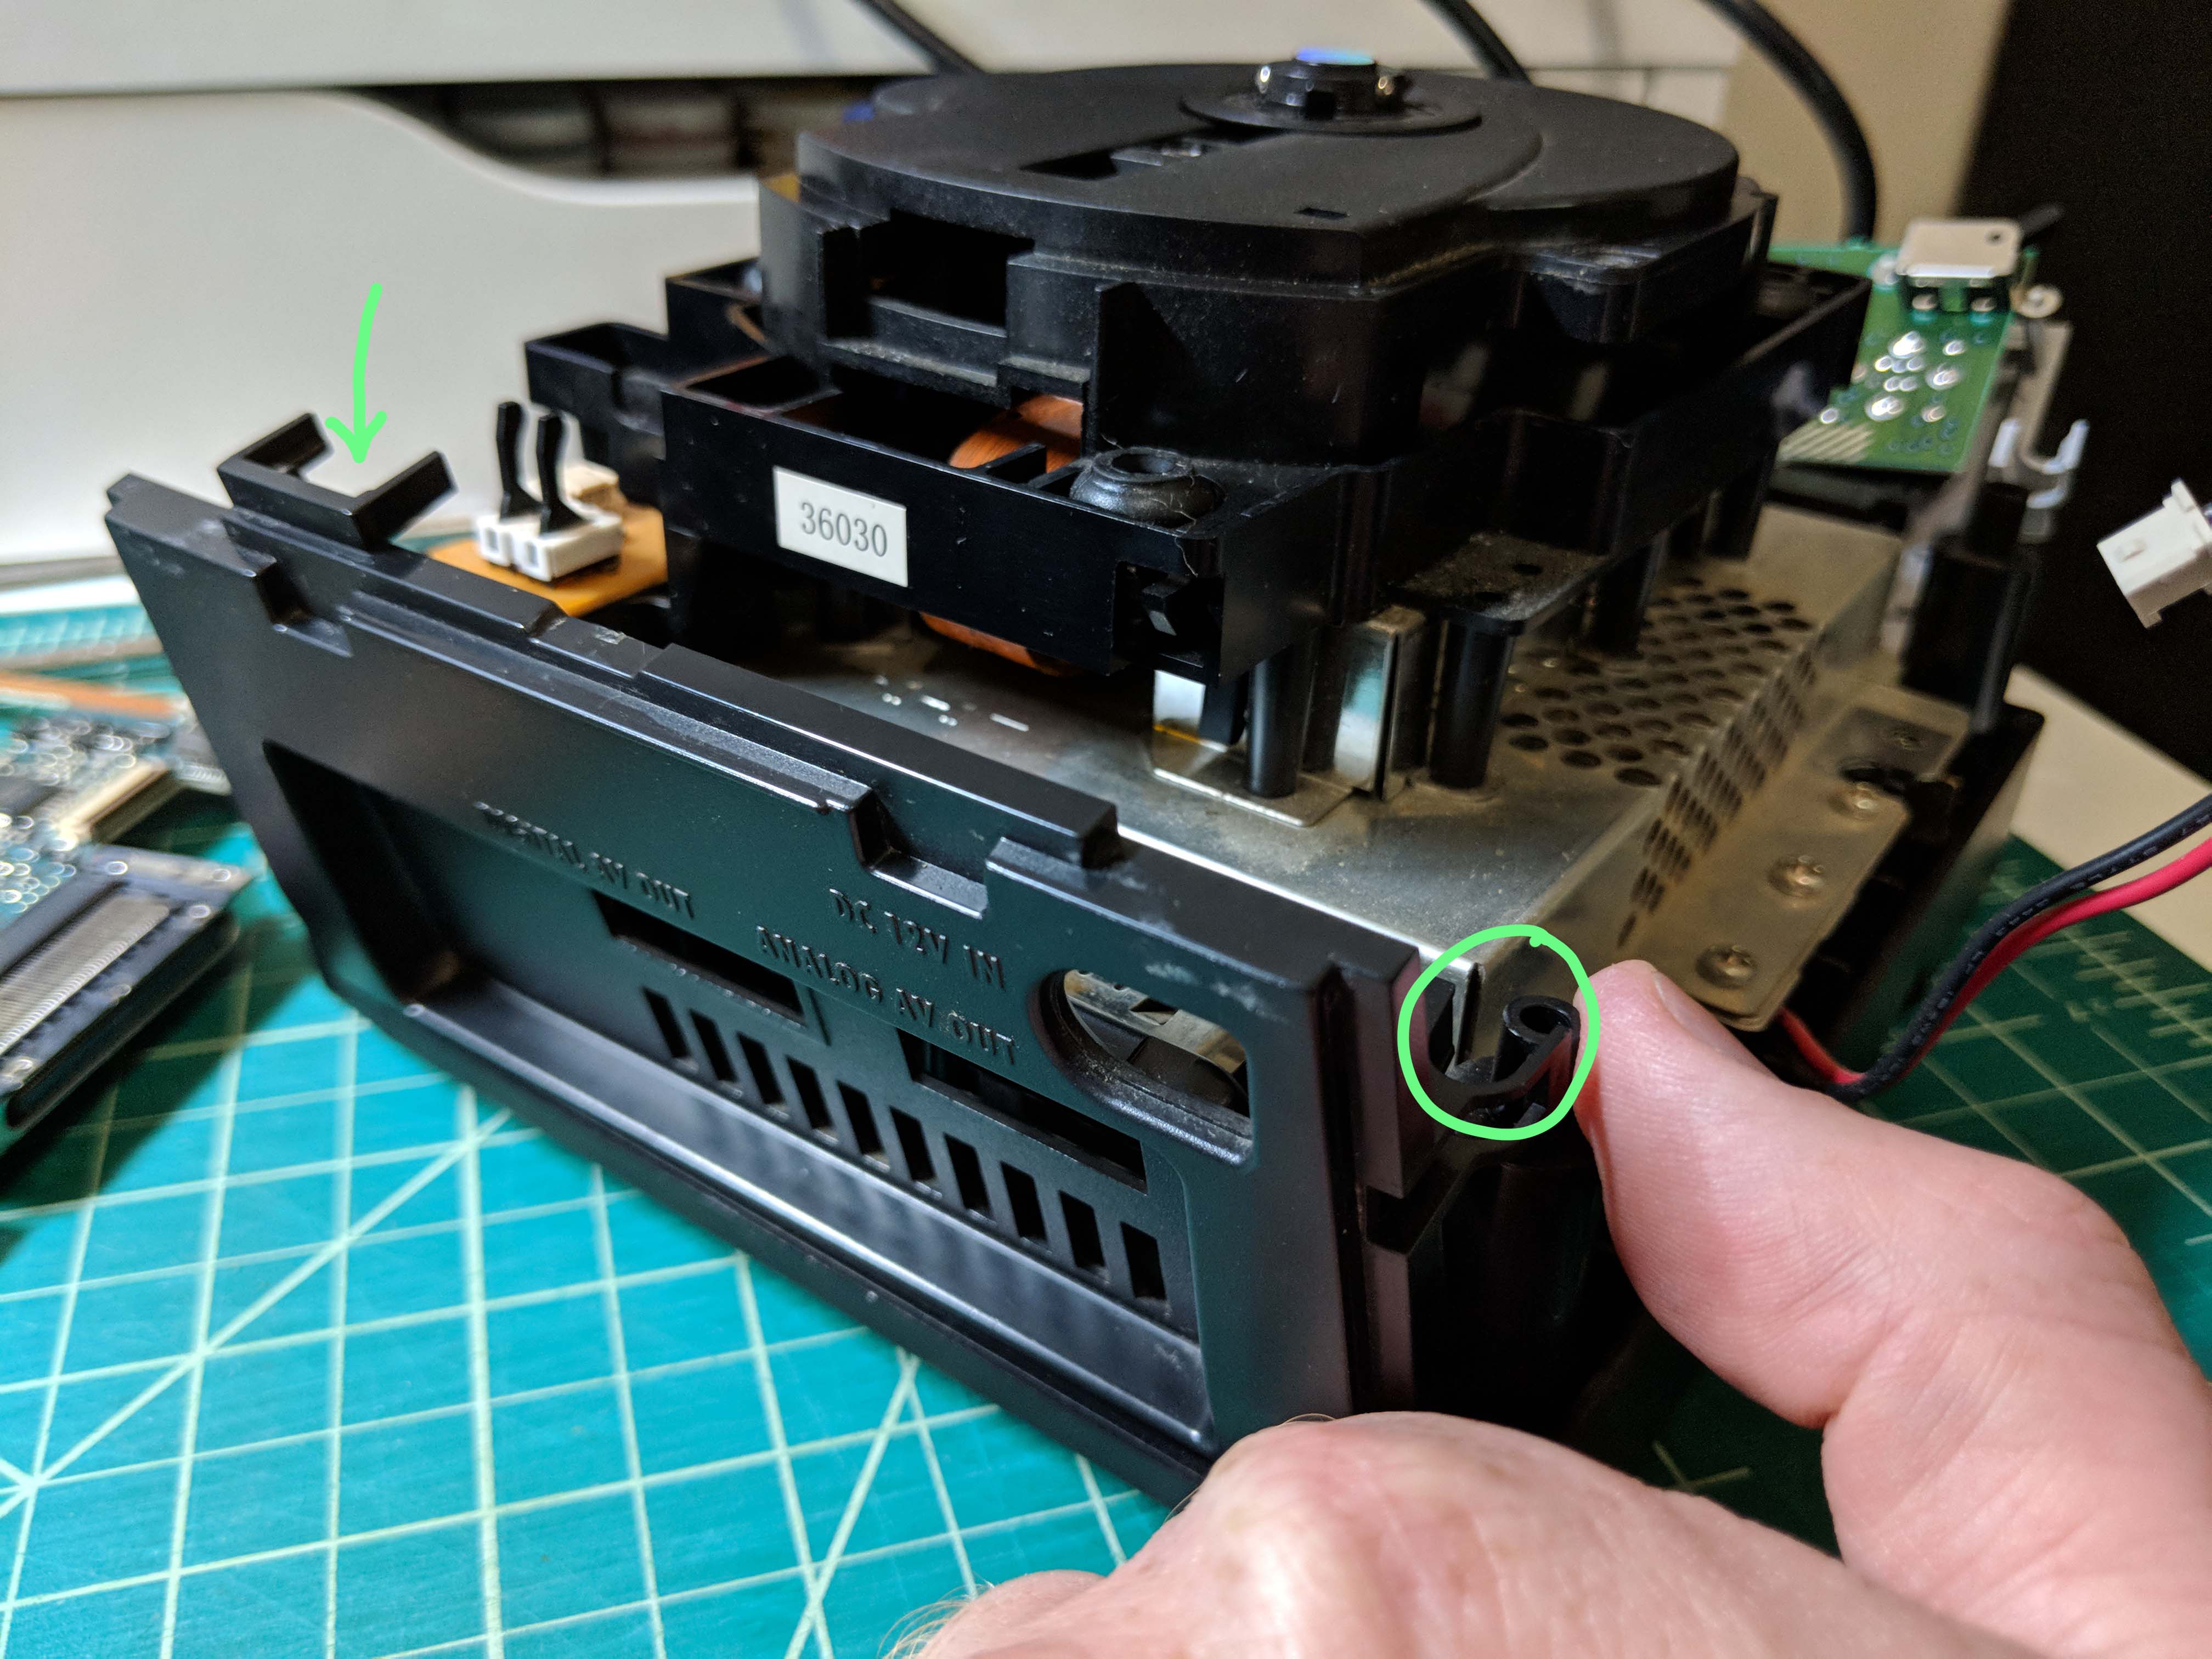
Pull forward on the tabs on either side of the back cover to free it from the main chassis, then remove it and set it aside.
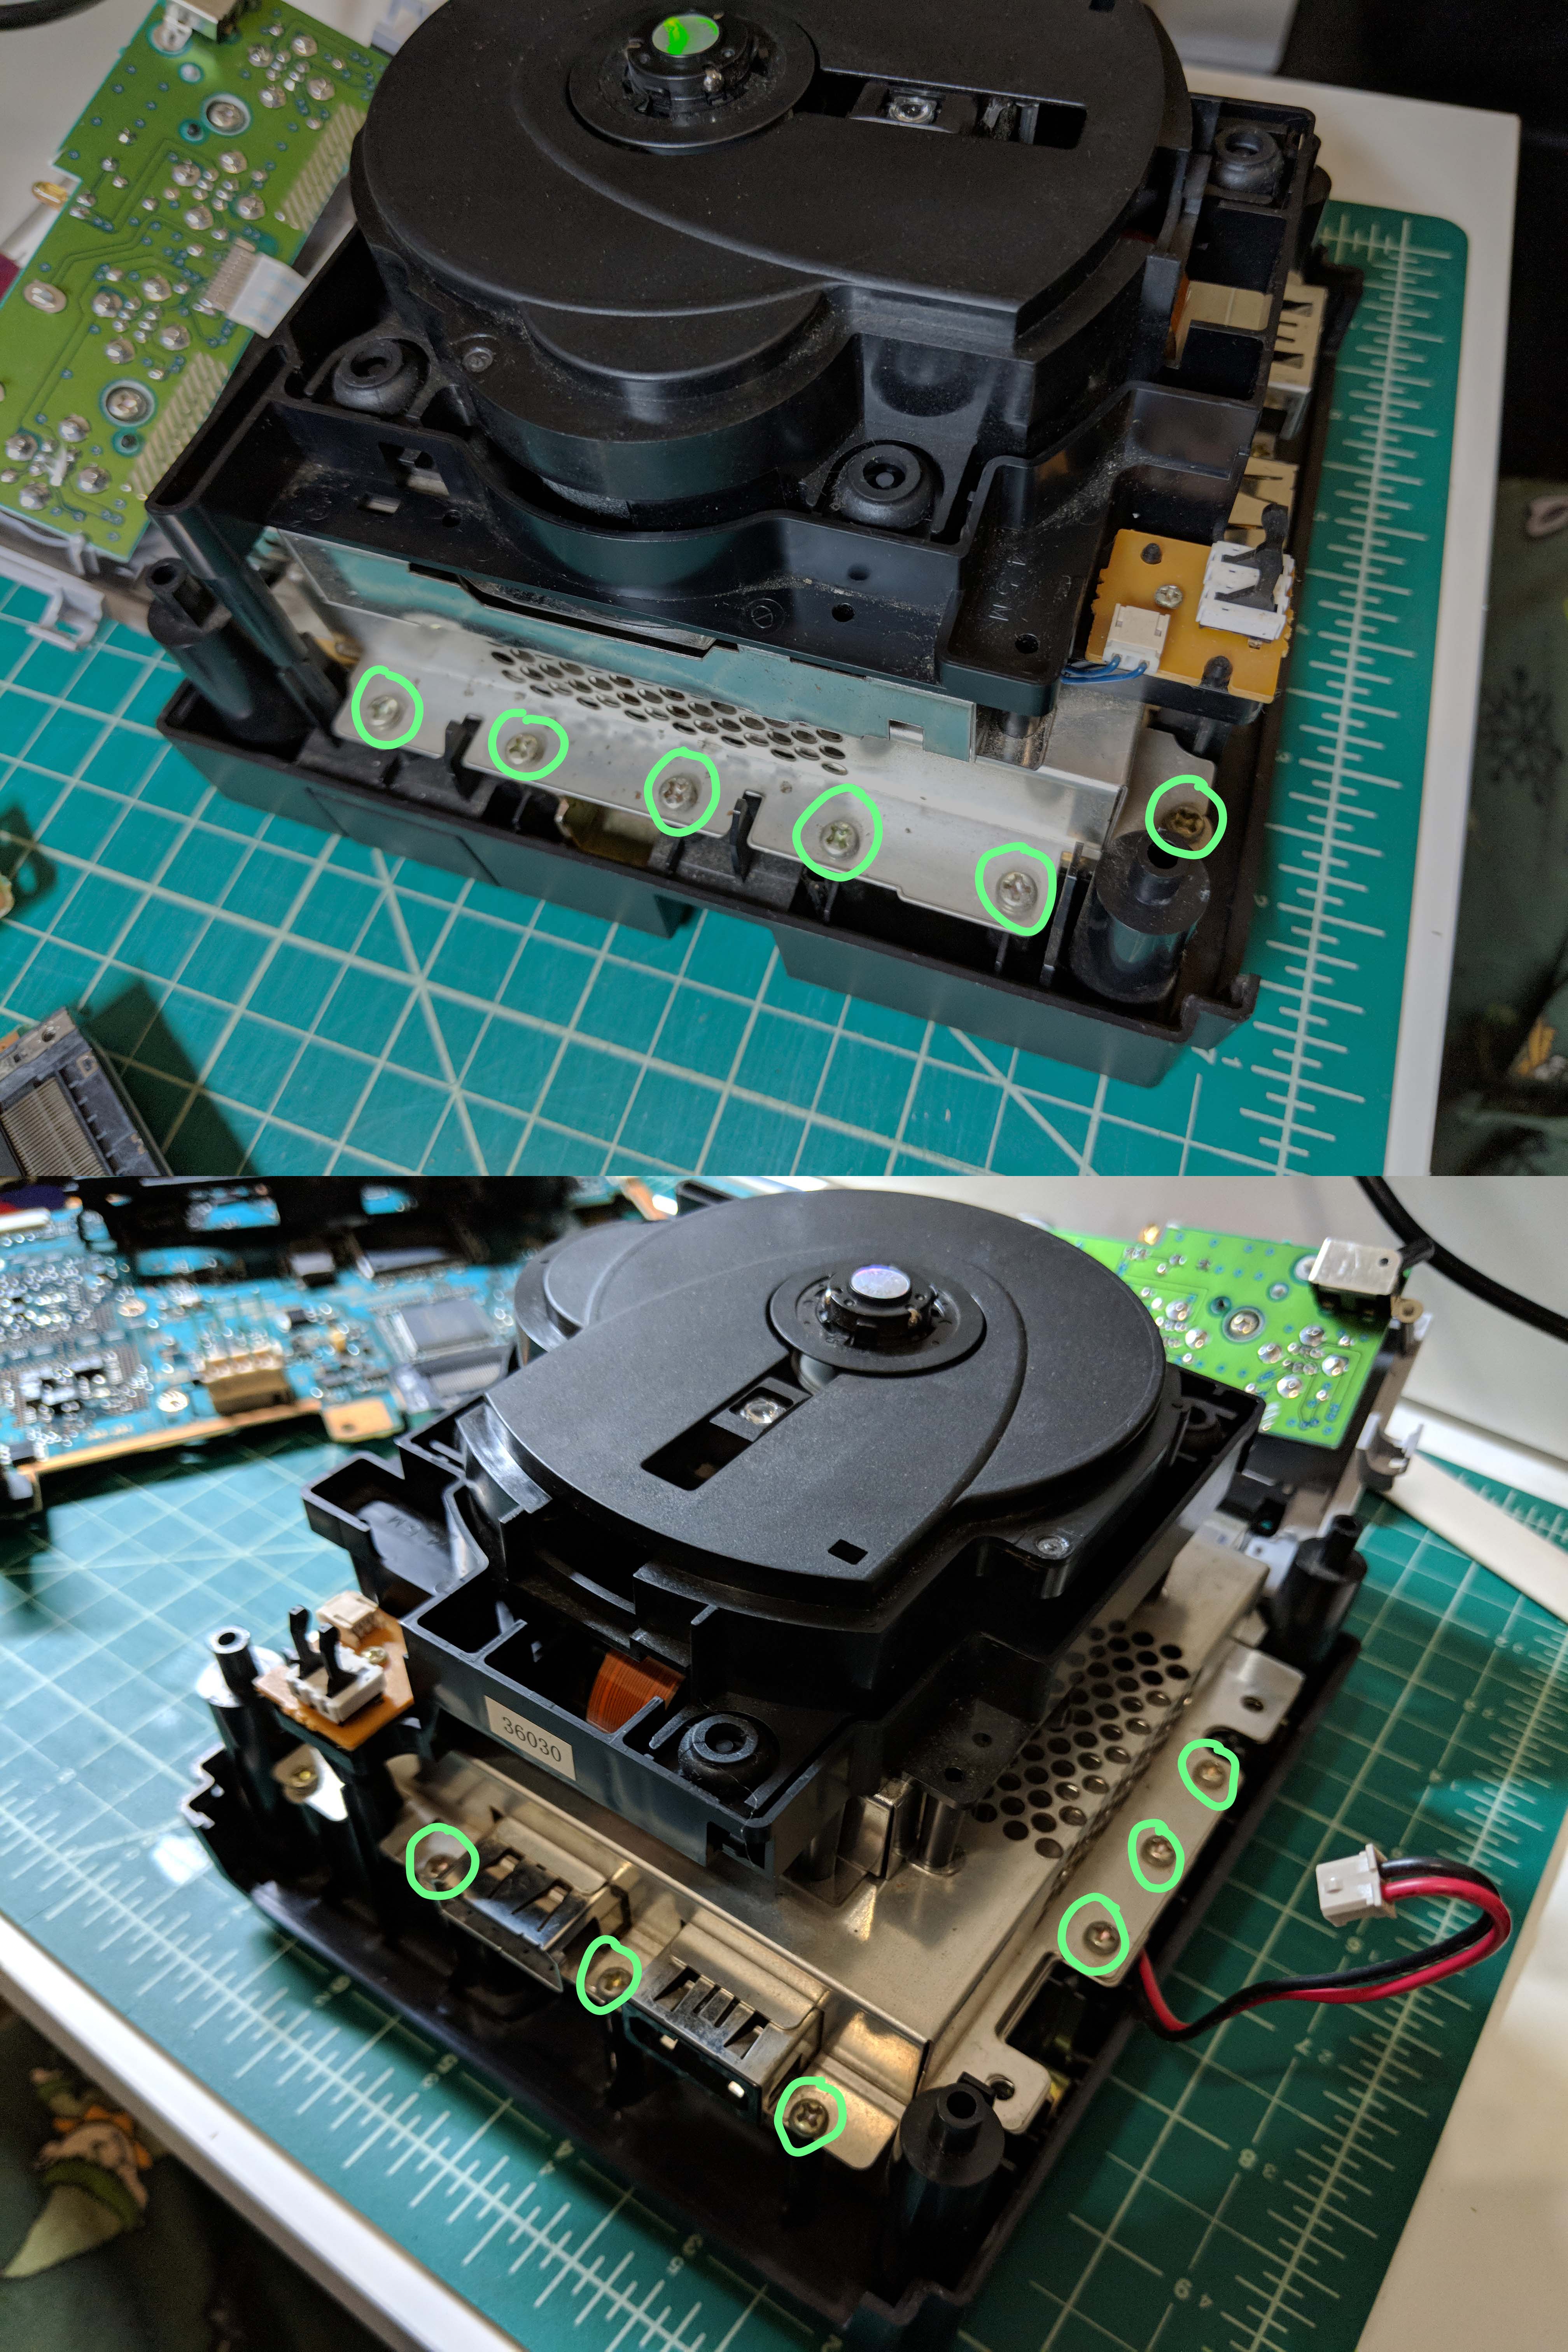
Remove the twelve screws securing the drive assembly, then pull up on the drive assembly to remove it.
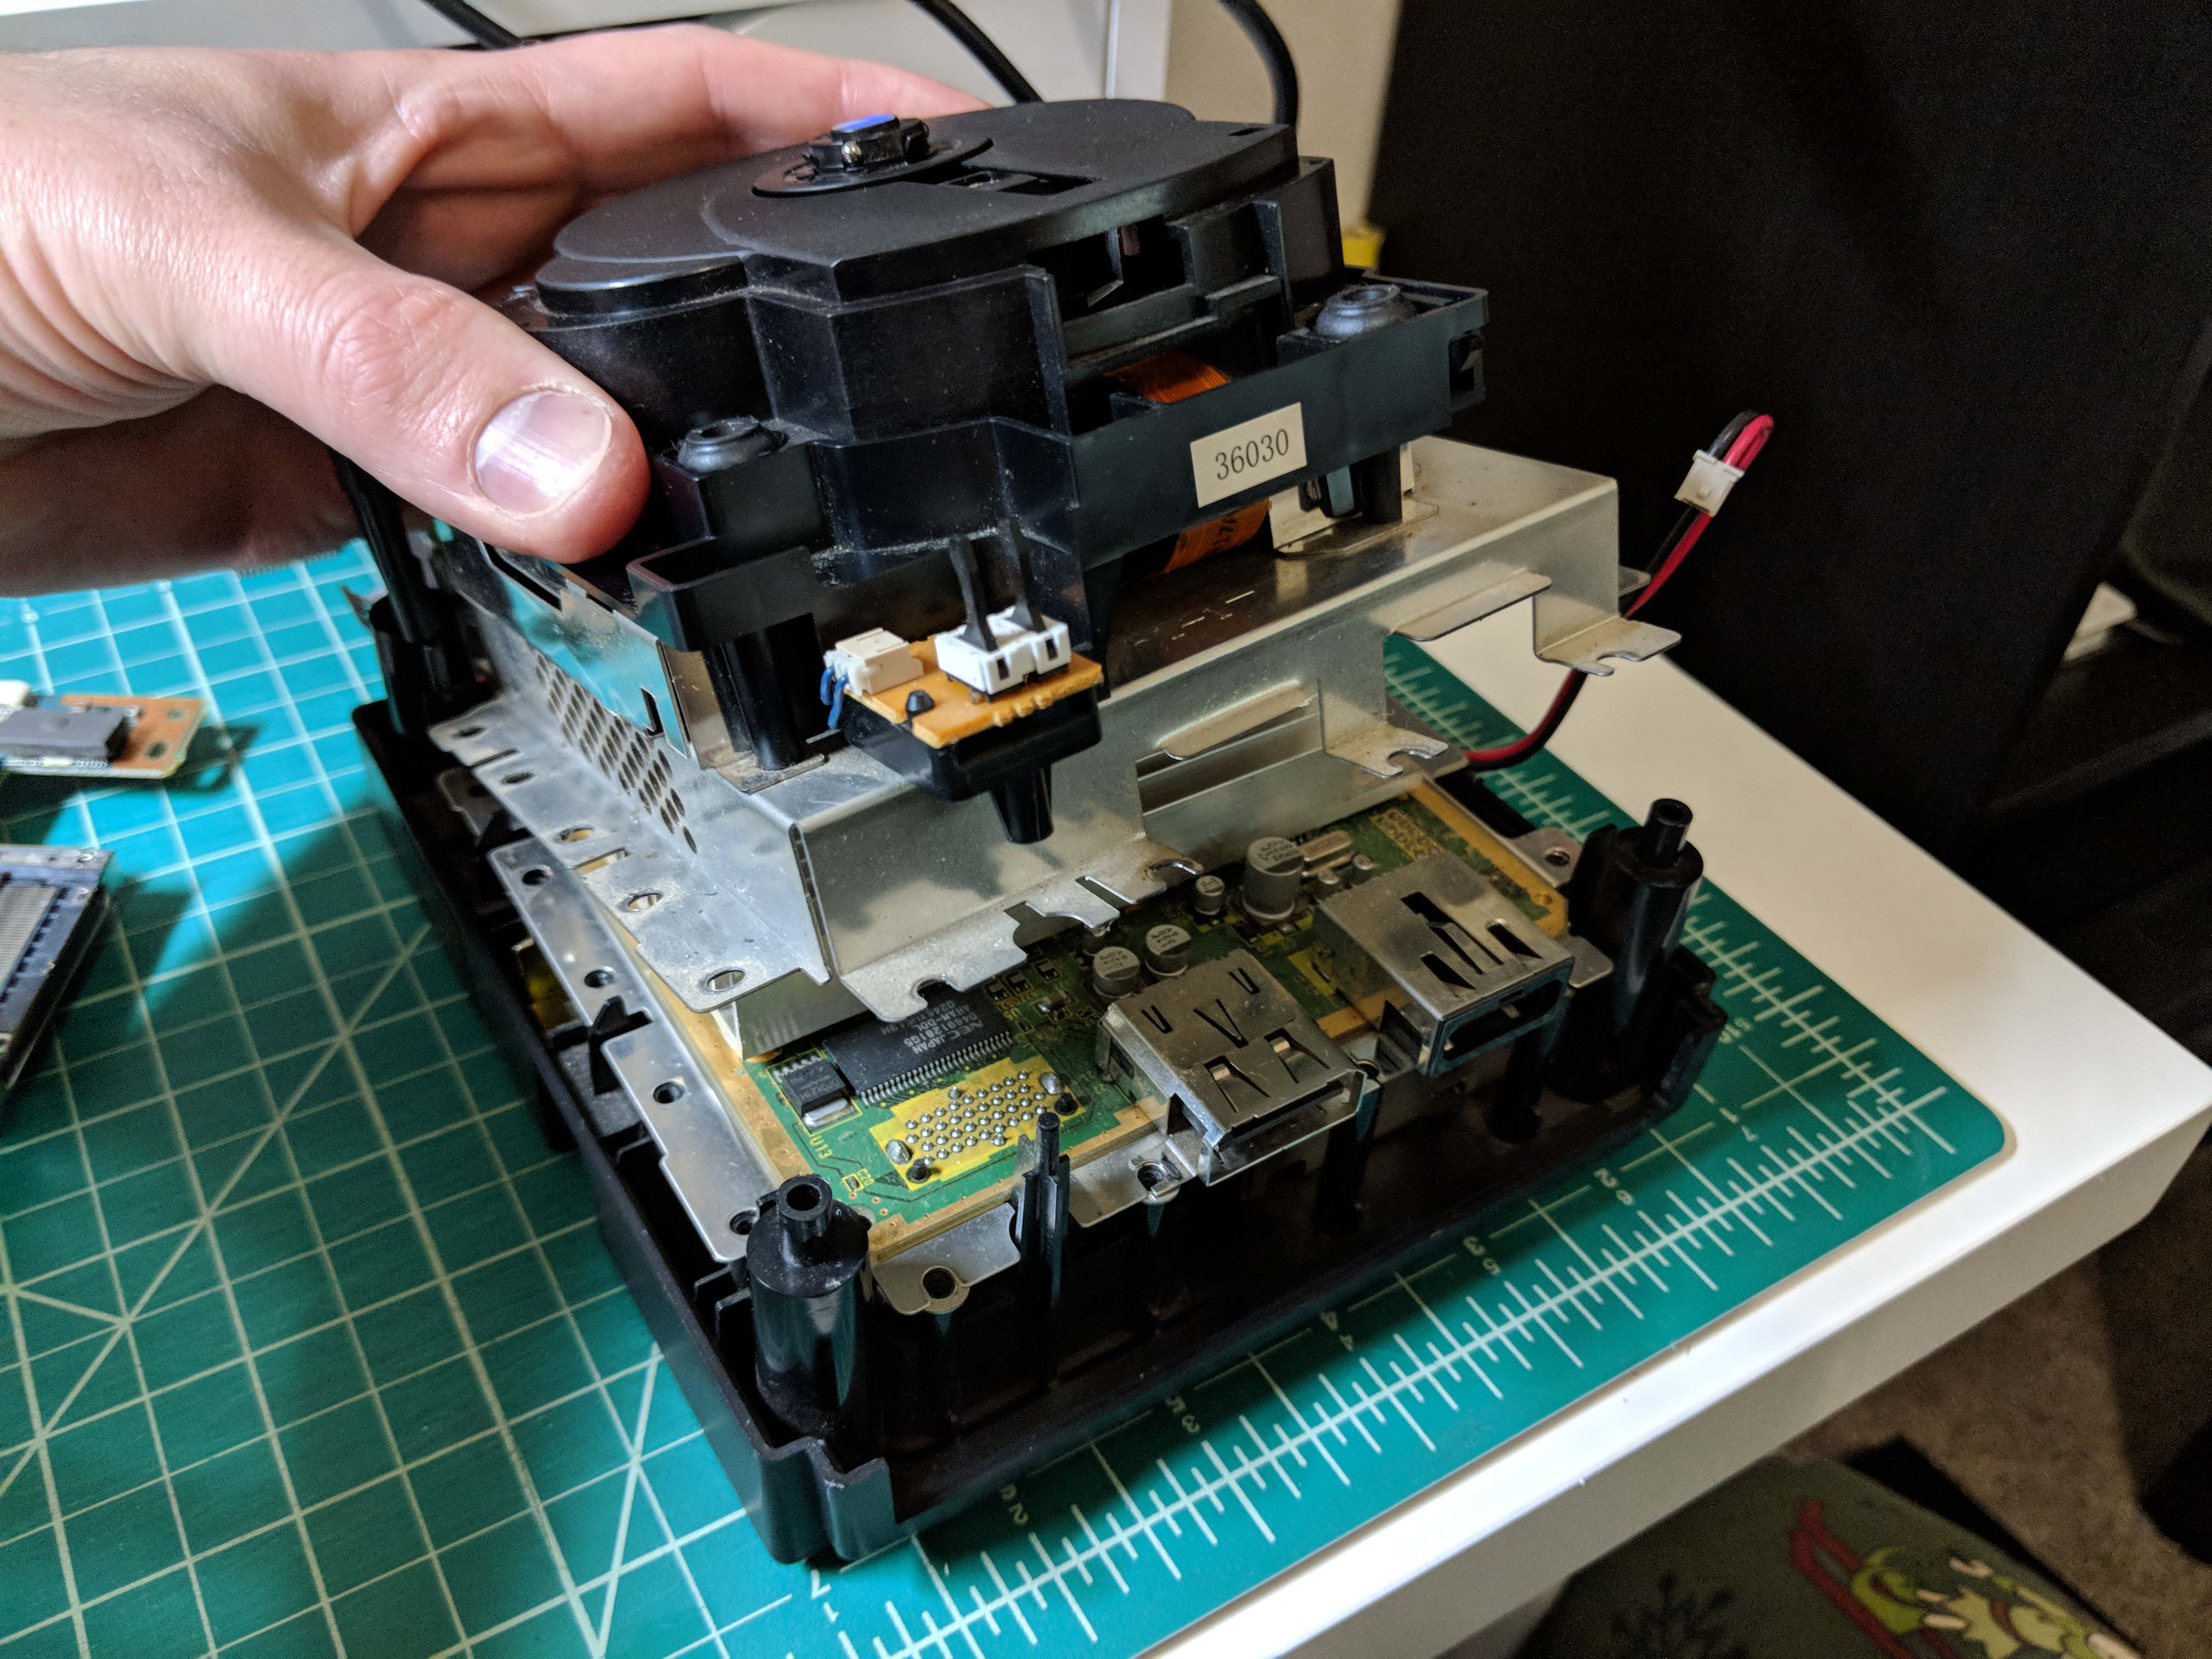
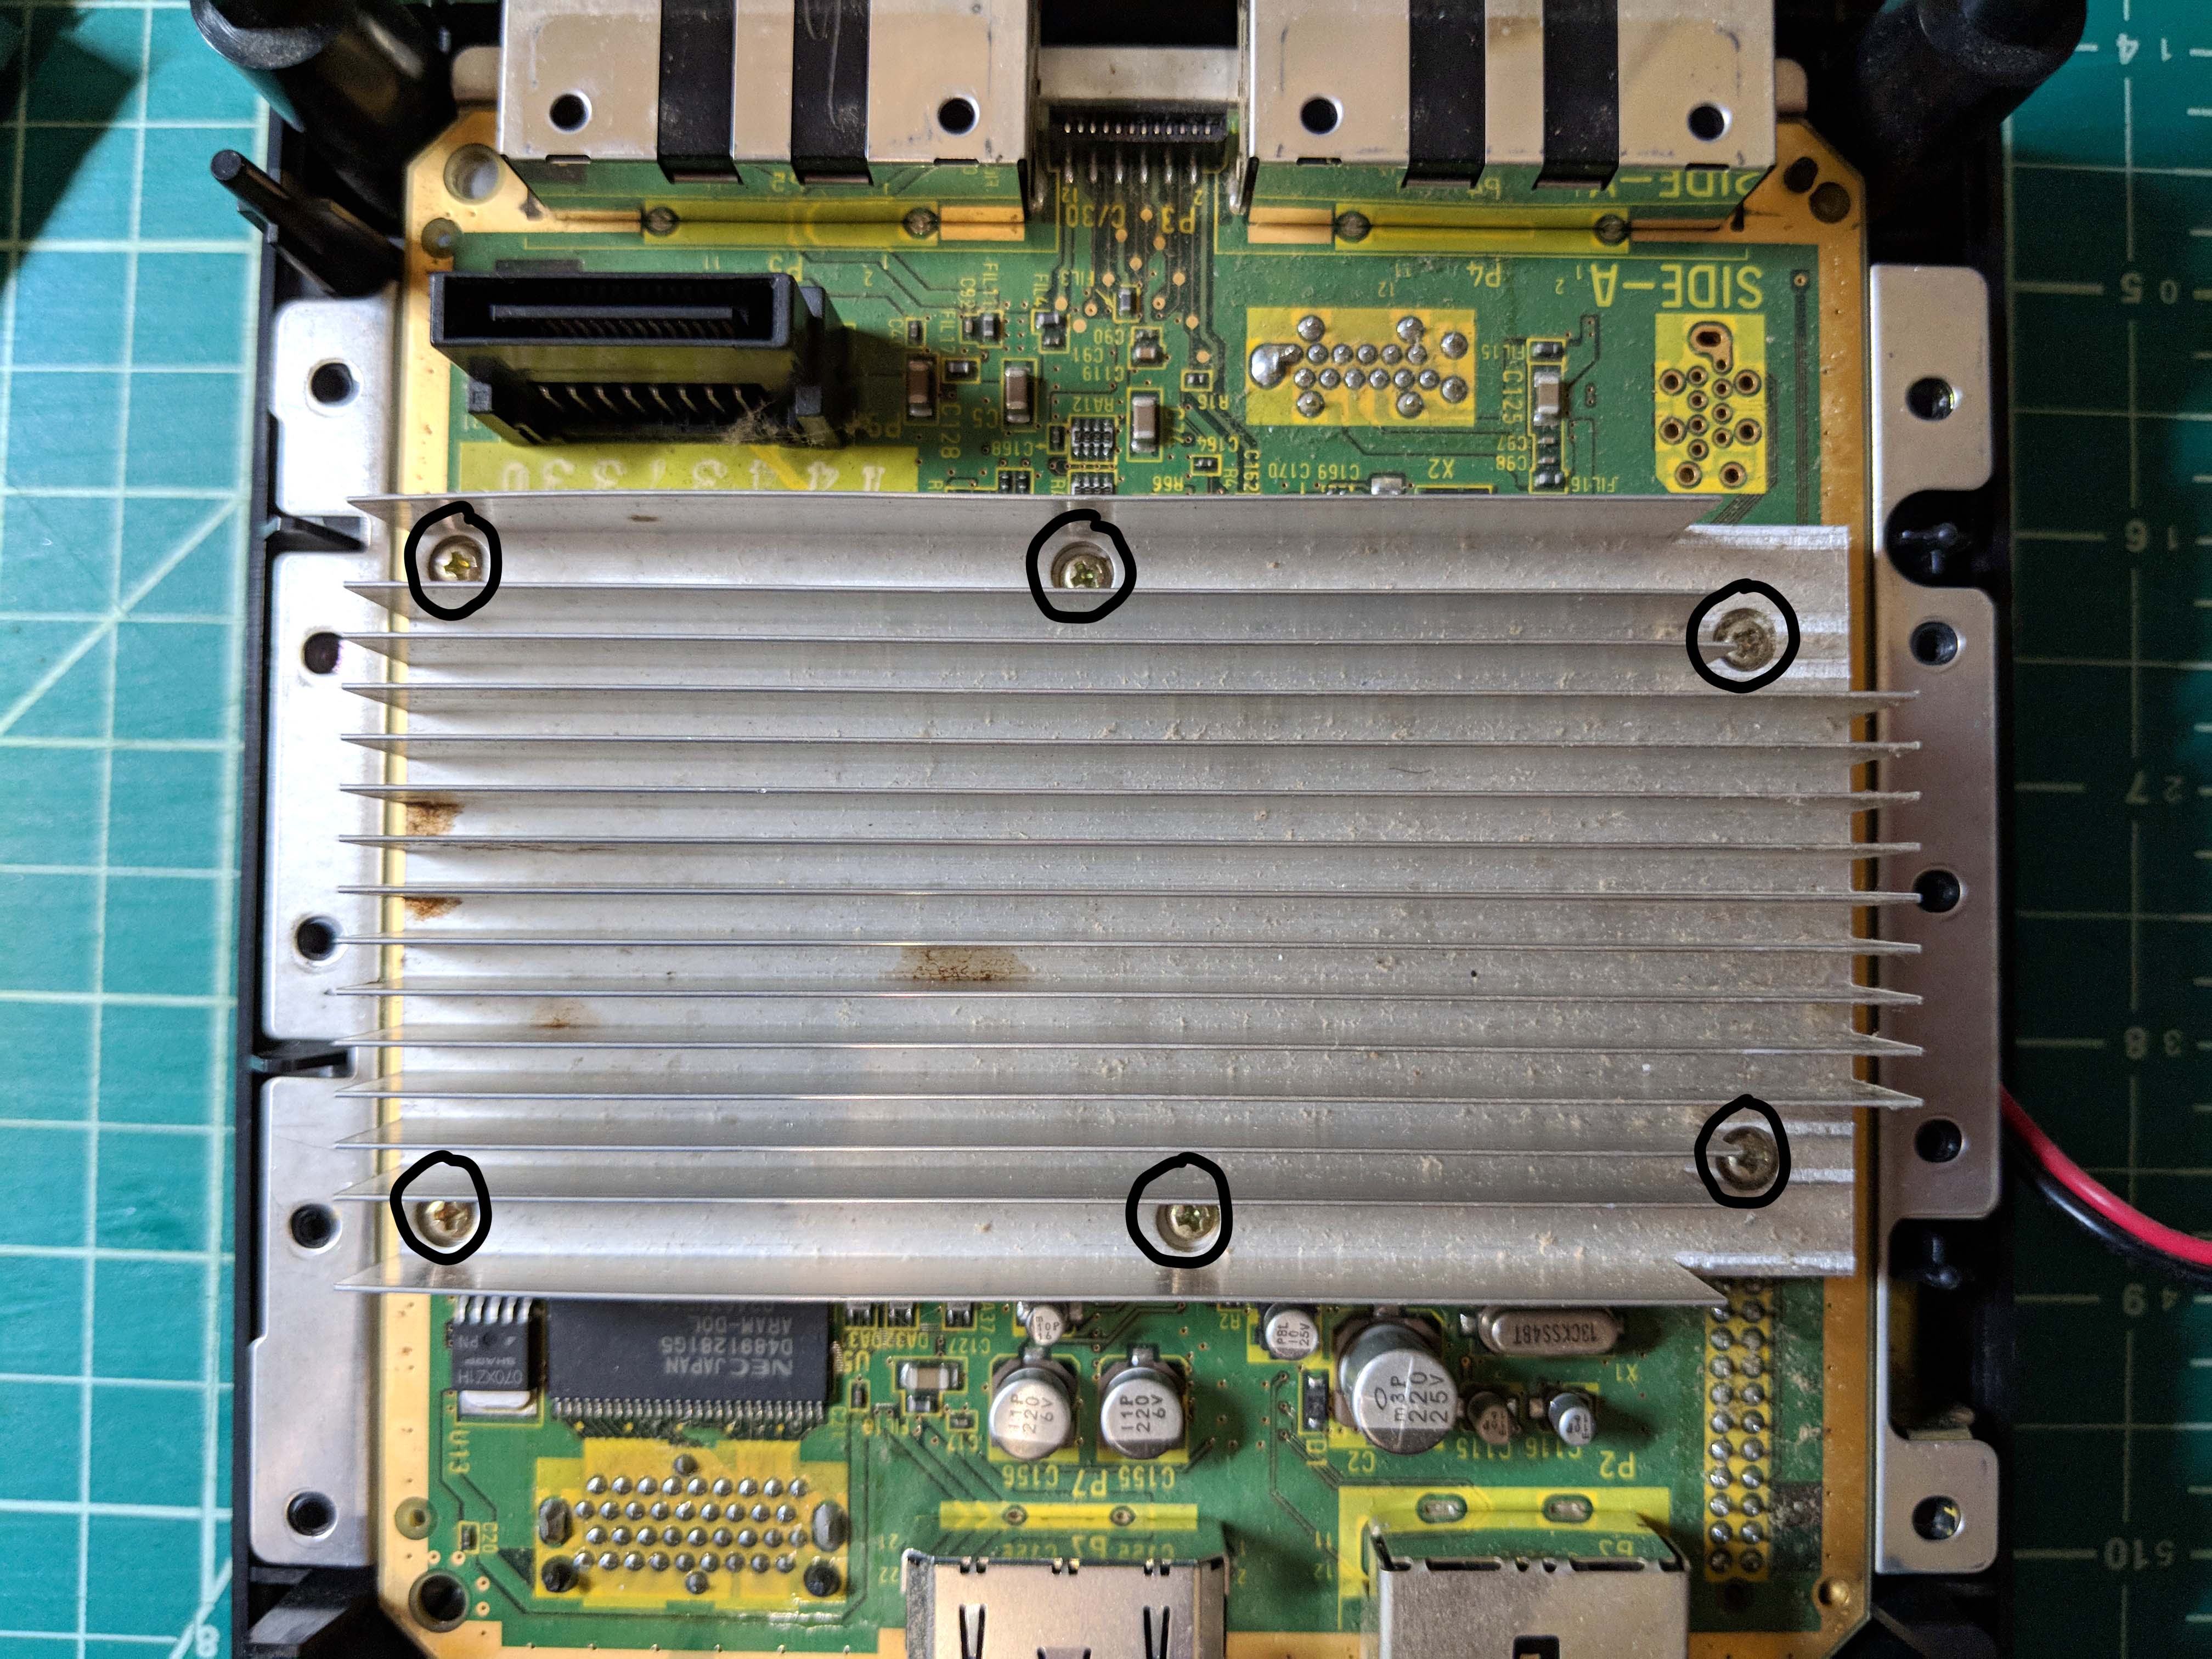
There are six screws securing the heatsink to the ground plate under the motherboard. Remove these screws, but leave the heatsink in place unless you need to work under it (the thermal pads will keep it from falling off). Pull up on the motherboard to remove it from the chassis.
Under the motherboard are two screws that secure the bottom ground plate to the power supply. You can remove these to gain access to the power supply.
